
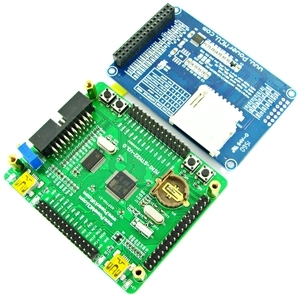
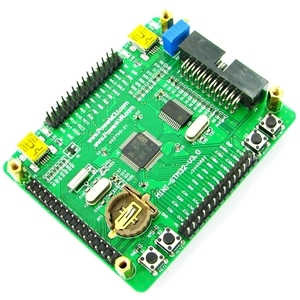
So I bought my first ARM development kit a few months ago and it has been my primary focus since is arrived. The kit contains ST’s STM32F103RB Cortex-M3 processor that can operate up to 72Mhz and has many fun and interesting peripherals on board.

I got my board from an online shop in Taiwan called micro4you and it was a great deal on the surface but let me tell you if you value your time at anything then order from the eBay stores. I made my order for a whole whopping $62 taxes and shipping in so I was extremely happy about that but after week two went by and their online order page still said “Processing” I started to get antsy. I emailed their customer service and then waited another week just to get a horrible English response of something along the lines of its shipped, just wait. After some more waiting my package finally arrived and I was glad it managed to get here in one piece as it took 41 days to reach me.
With milestone one cleared it was onto the actual act of using this fancy new device to blink some lights! I was trying to save some money and so I did not purchase a JTAG programmer to go with the unit under the understanding that it came stock with ST’s serial flash loader. I plugged the Mini in and the LCD flashed to life with the uCOS II & uC/GUI demo and was quite impressed at the speed that the Mini could draw on that screen. Their is one part of the demo in which their is a windows like window open with a slider and i was able to move everything around as fast as I could without any tearing effects. The micro4you website also provides a more standard LCD demo so I decided that would be a good second test to run. I loaded up ST’s flash loader software and it found the Mini without issues but when I flashed the demo nothing but a white screen was showing and the flash loader no longer would connect. Lesson number two is these demos are not built for just the Mini, and as a result it programmed over the serial bootloader making it impossible to use unless I purchased a JTAG programmer.
With this new information I went on the interwebs looking for a comparison of JTAG programmers and discovered that really their is only 4 options available for under $1000.
| Programmer | Price |
|---|---|
| Segger J-Link | $350 |
| Segger J-Link EDU | $ 70 |
| Rowley CrossLink | $150 |
| Olimex ARM-USB-OCD | $60 |
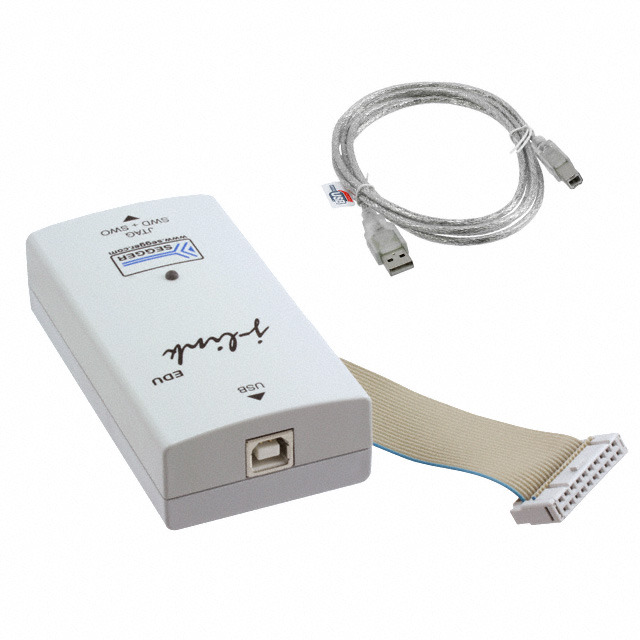
Each have their own strengths but here is my opinion of the selection. Olimex makes quite a range of boards and their adapters are garenteed to work with them so if I ran a lot of olimex kits I would go for this option, however I own nothing Olimex so I passed it over. Paul over at Rowley made me a deal thats hard to pass up, buy their personal licence for $150 and he will toss in their CrossLink Lite for free! while this is a fantastic deal I unfortunately had already settled on KEIL uVision ARM-MDK as my compiler. That left me with Seggers line of devices. The J-Link is a professional quality tool that lets you run flash breakpoints, flash downloads, and their GDB server. The J-Link EDU is the same as its professional counterpart but it removed the flash download support and you must not use it in any commercial project or setting. I am a hobbiest so that does not worry me and for $350 if I was to ever make something I would just buy a new one! The lack of flash download worried me but it turns out that just means you can not use their flasher suite and has nothing to do with programming any devices. Needless to say I am the proud owner of a J-Link EDU now.
Development suits and compilers can be a mess to deal with and I went through it all while waiting for my J-Link to arrive from Digi-Key. WinARM & YAGARTO using Eclipse, Rowley CrossWorks, IAR and KEIL. The first two options where a nightmare to set up properly and had me running through make files and pulling my hair out. Eclipse is a wonderful IDE but if the back end is annoying then forget it! CrossWorks it a fantastic application in every respect, while debugging everything was clearly laid out and easy to understand but what was not clear is how the heck to access registers and definitions as they are all hidden 100 files deep and apparently generated from the datasheets and stored in XML sheets. Sheesh. However its the ONLY professional quality compiler/IDE that is affordable at $150 for a personal licence so in the end I might end up using it after all. IAR is a powerful beast and I felt out of place in its UI, I can not really explain why it just felt weird so I moved on to KEIL. KEIL is where I felt comfortable, its UI is very standard and while debugging you can select a peripheral and see every single register and make simple changes form drop down menus. The simplest and best layout to debugging I have ever seen, its downside is it only remember your window locations about 95% of the time but thats easy to get over. KEIL offers a 32kb code limited version of their suite for free so that is what I decided to use, if you want to know the full licence price its ~$1500 so don’t get your hopes up!
KEIL is a simple install and so is the J-Link software but making them work together is not such a simple task. The dll that KEIL uses to communicate with the J-Link was an old version 4.20a and it did not support SWD mode, to get around this I copied the JLinkARM.dll and jlink.exe files from ‘c:program filessegger4.20c’ into ‘c:keilarmsegger’ and reloaded my project and viola I could see my cortex-m3 device via SWD but now their was this annoying popup. By annoying I don’t mean once, I’m talking popup then select device three times then agree to terms twice every time annoying here so I went out and got some more drivers. I did the same as above with driver version 4.20n and now the popup is only the licence agreement from Segger as it should be but SWD mode does not work! It took me about two hours to find out that I needed the jlink.exe from the stock KEIL install and the 4.20n dll to get the best of both worlds. So if your reading this and are gonna use the same combo I say good luck to you!